
Wordpress Product Upload Guide
Are you a proud owner of an eCommerce WordPress website and ready to learn how to upload new products? Without further ado, let’s get started!
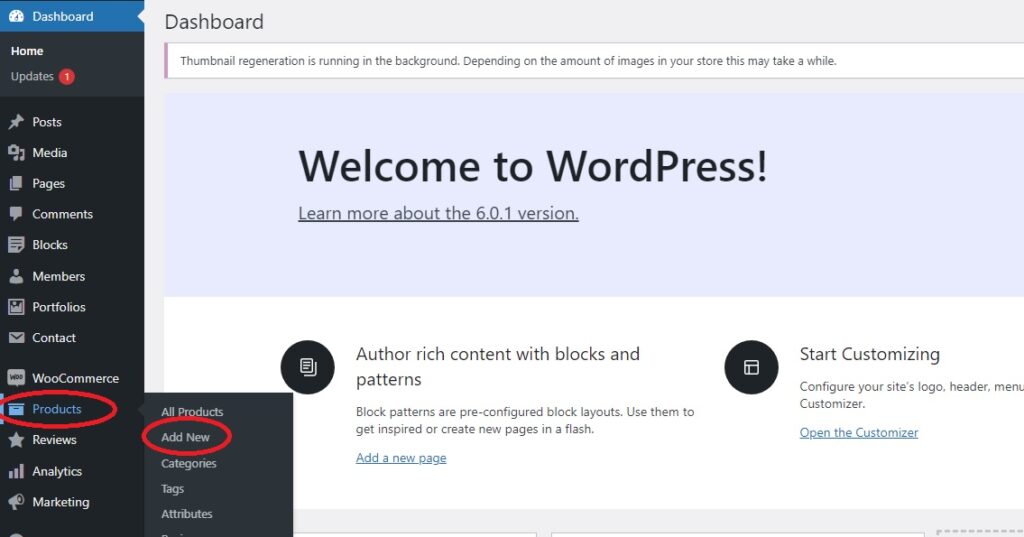
On the Dashboard, let’s start navigating through the following path:
Scroll down to Products > Add New as indicated below
Now that we are on the Add New Product page, as indicated on Step 1. We can now begin.
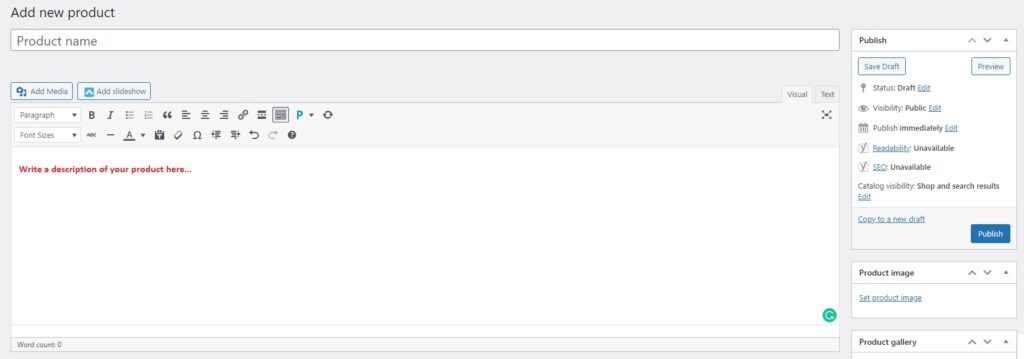 Step 1: Adding the product name and description.
You can add start by adding your product name and description. Writing a short description of your product can be helpful to your potential buyers.
Now we proceed to the adding the price, below under product data as shown on step 2.
 Step 2: Product Data
The product data section is where majority of important data is added for your products.
General Section
Price
- Regular price - Product's normal price
- Sale price - Product's discounted price that can be scheduled for certain date ranges.
Tax
- Tax status - Taxable/ Shipping only/ None
- Tax class - Choose which tax class should be applied.
Up next is a short product description. Under step 3
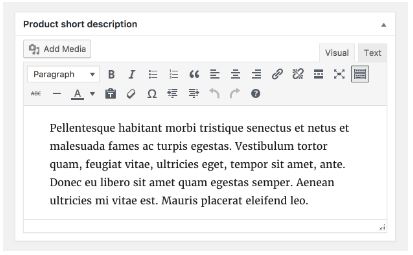 Step 3: Adding product short descripition
Add an excerpt. This appears next to the product imagery on the listing page and the long description appears in the product description tab at the bottom.
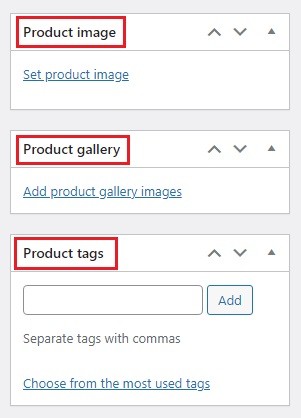 Step 4: Adding product images
You can add a featured image (Main product image), gallery images (additional images)
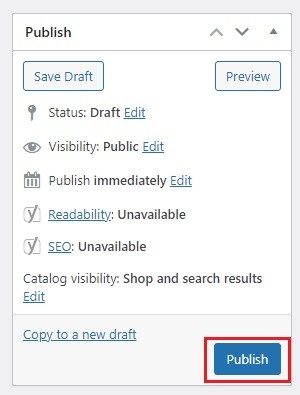 Step 5: Publishing the product
After updating all fields, you can click the upload button.
And you’re done! Congratulations! You’ve just learned how to upload your own products.
Editing existing products
To edit an existing product, go to Products > All Products under WooCommerce.
You’ll see the full list of all your uploaded products, hover the cursor over the product name you want to edit until you see a small menu pop-up. Click on ‘Edit’ to edit the product.
 Editing existing products


Menu
© 2024 Ngakwethu Digital Studio | All Rights Reserved.


